


Bennett's Lunch Money Step-by-step
Hey everyone, we've been so busy with getting this site rocking and filling web orders that I haven't had as much time to edit video. But, I figured we could at least throw together a few step-by-steps so you can keep filling your boxes.
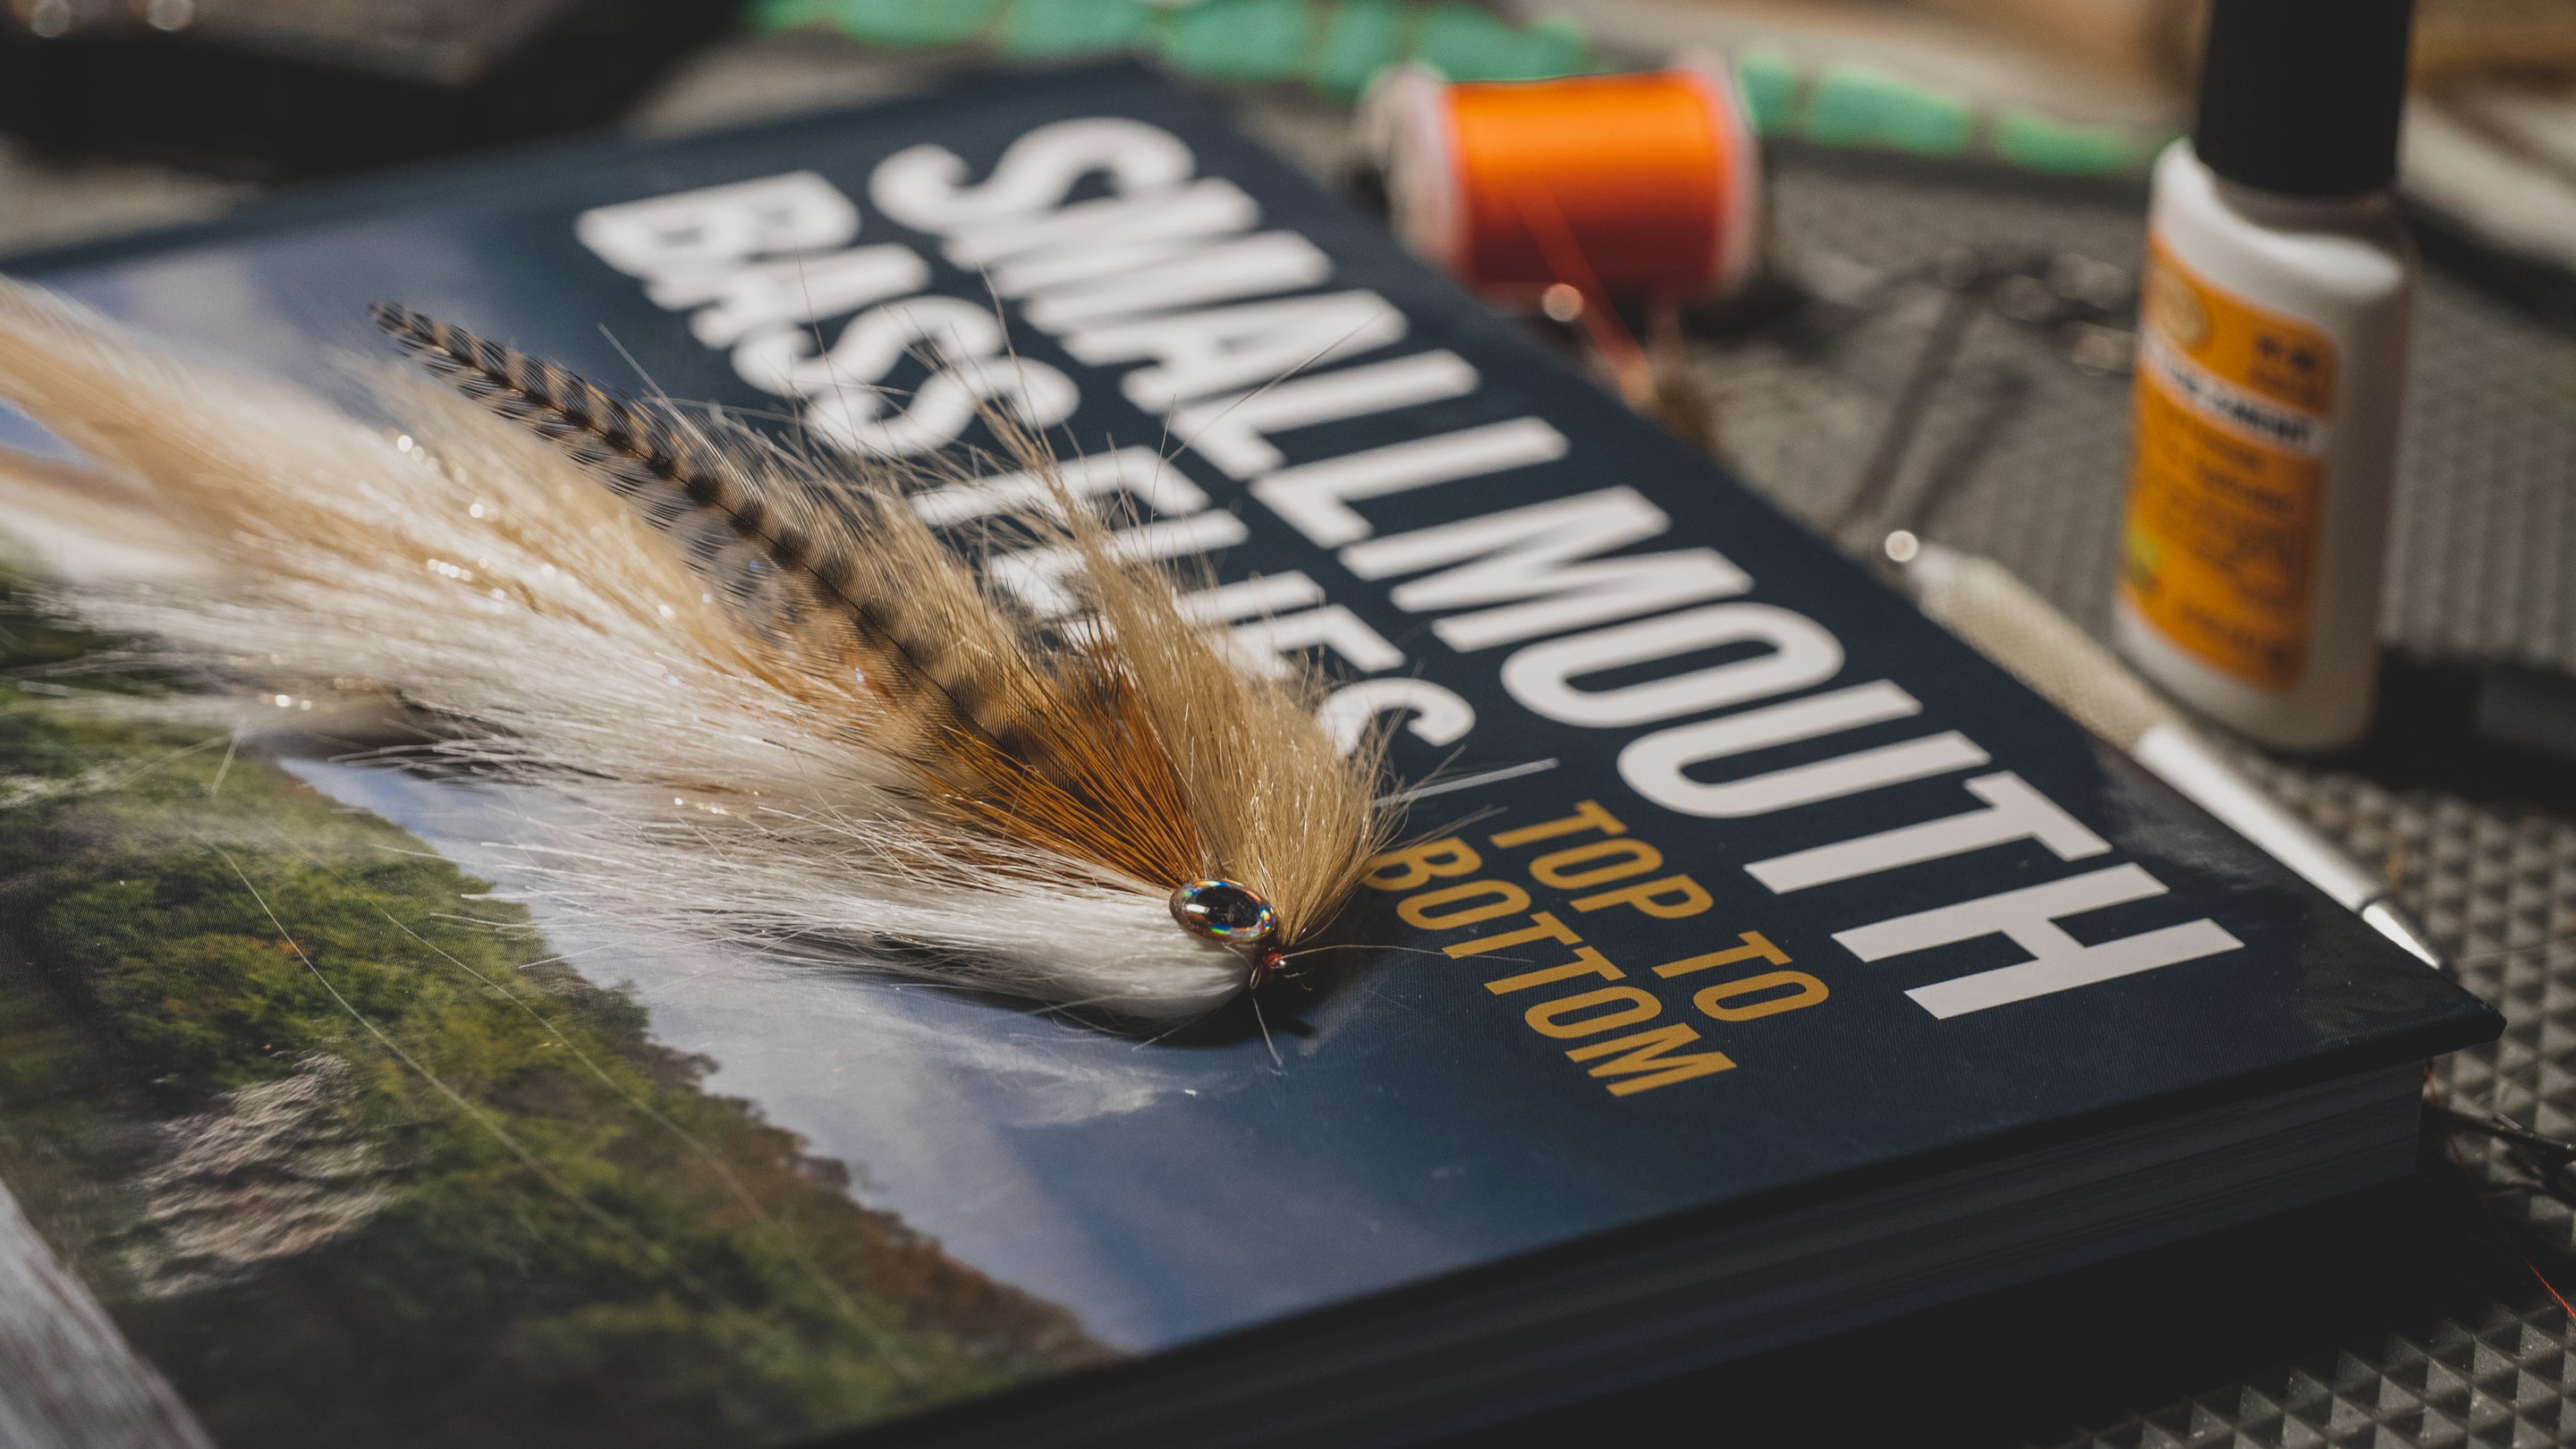
Bennett's Lunch Money is an awesome streamer initially intended for fishing close to the bottom for bass. The inverted hook allows you to get a little closer to where fish like to hide. As you might have guessed, this also makes a great trout streamer. Other popular color combinations include: Olive/White, Chartreuse/White, Brown/Yellow.

We want to see how yours turn out! Tag us on Instagram & Facebook!
Materials:
- Hook: Gamakatsu B10s (#2 shown)
- Eyes: Double Pupil Lead Eyes (medium shown)
- Tail/Body: Zonker Rabbit Strips (natural ginger shown)
- Legs: Any Silicone Legs (sili legs & barred/speckled shown)
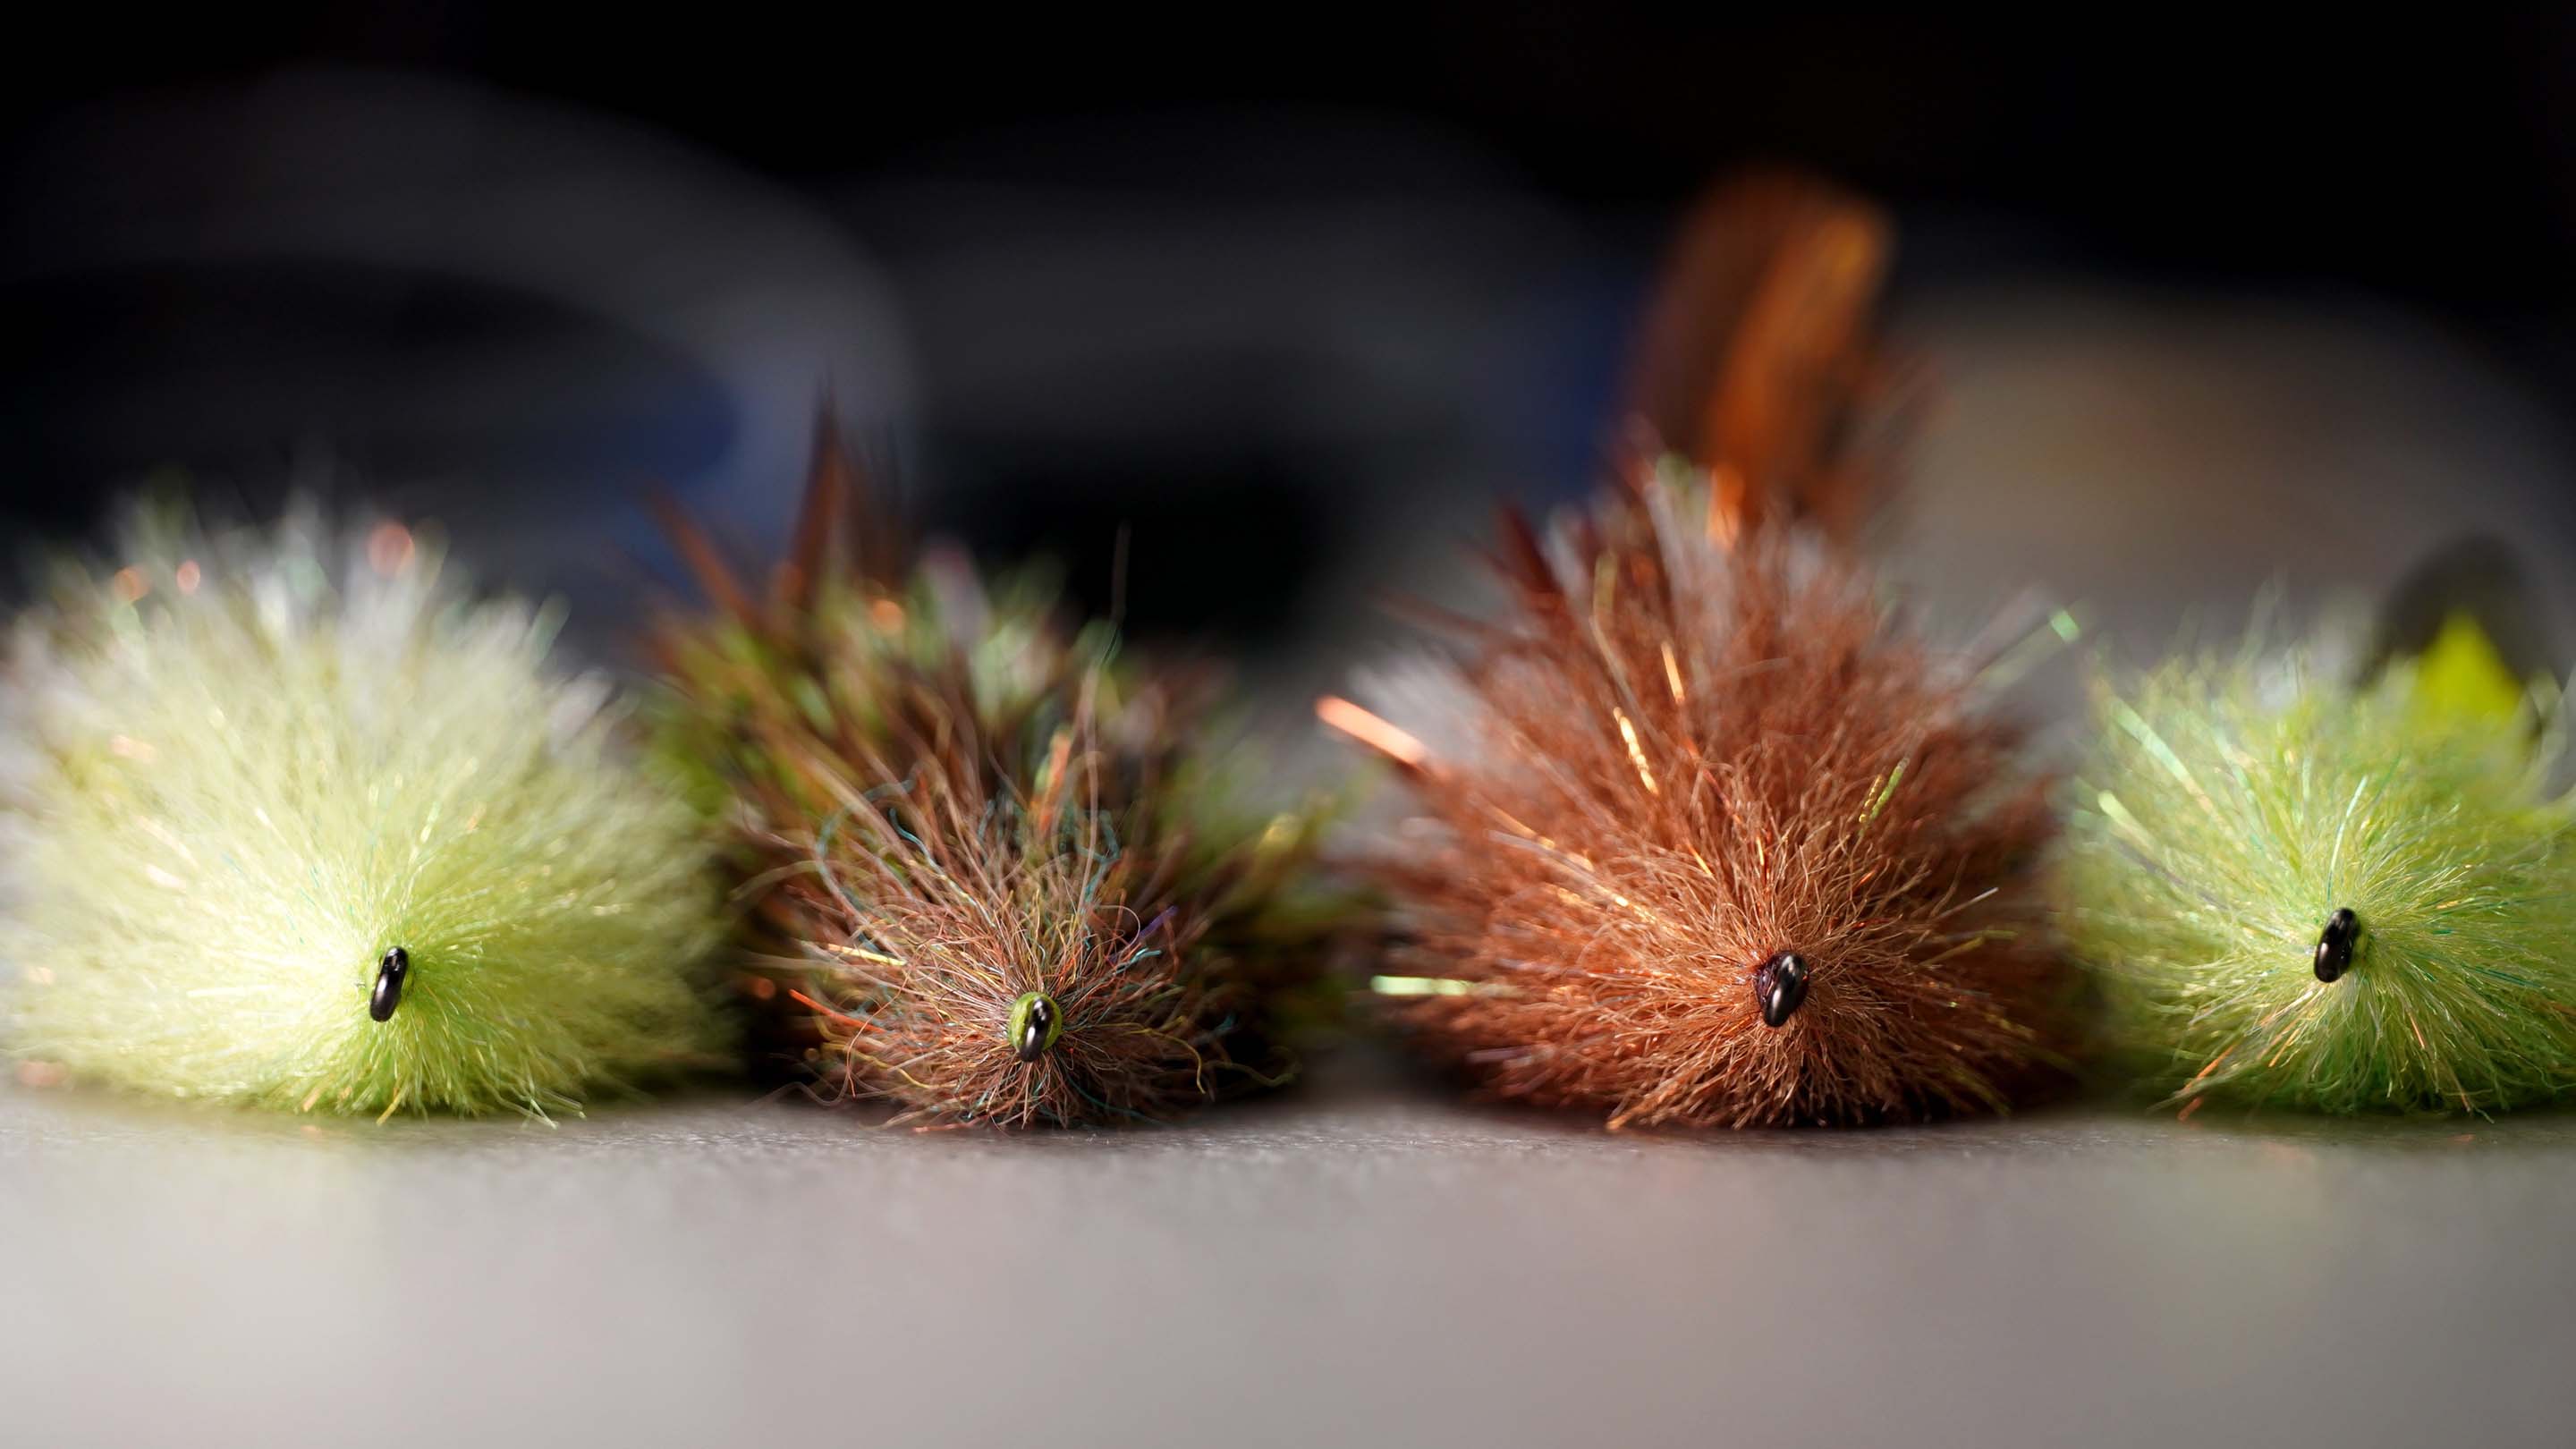
- Head: Senyo's Laser Dub (tan & white shown)
Other Tools Used:
- Renzetti Traveler 2000
- Dr. Slick Tungsten Scissors
- Griffin Supreme Bobbin
- Loon Fluorescing Fly Finish
- Loon Infinity Light
- Sharpie: Black
STEP 1:
Secure your hook safely in the vise and tie in dumbbell eyes on the top of the shank an eye length back. I like to use "X" or "criss-cross" wraps to start then make sure to mix in wraps around the base as well. if you want, adding a little super glue doesn't hurt.

STEP 2:
Bring your thread back to the bend of the hook. Measure out your zonker strip to be just slightly longer than the shank of your hook. Puncture the hide with the point of the hook. At this point, you'll actually need to remove the hook so you can properly seat the rabbit.

STEP 3:
After you've secured the rabbit for your tail, do not trim the leftovers. Advance your thread back up to the dumbbell eyes and take two or three wraps forward with the zonker strip around the shank before securing. Now you can trim the leftover rabbit. The key here is to leave some space behind your eyes.


STEP 4:
Grab two silicone legs for this fly, usually an accent color is the way to go instead of matching the zonker strip. I use one leg on each side tied in the middle.

STEP 5:
We're going to use laser dub on for the head on this fly. Big thing here is that most tyers will use way too much of this material! For this color scheme, we'll be using tan on top and white on the bottom. Before tying in, pull this material apart and align the fibers. When you're ready, tie your laser dub in to the shank in the middle. It might help to imagine creating a "V" with the material.

STEP 6:
Now, adding cheeks is optional and requires a third color of dubbing but it is pretty easy. Grab a very small clump and split it between each side. The last top & bottom stacks (tan/white) will be placed in front of dumbbell eyes.


STEP 7:
Whip finish and trim your thread. If you want a little extra holding power, head cement can be a good addition here. In this version, I've added a fluorescent hot spot with Loon's UV Fluorescent Flow.

STEP 8:
Grab any kind of comb or dubbing brush and really work the laser dub brush head. From here, grab a sharpie and add some barring to the head.
We want to see how yours turn out! Tag us on Instagram & Facebook.